Dockerize a Django, React, and Postgres application with docker and docker-compose | by Anjal Bam
Dockerize Django and React applications the easy way.
Introduction
In the battlefield of modern web development, Django and React are both very great warriors that have been fighting battles for a very long time. The addition of our Knight PostgreSQL to the battle makes our tech stack unbeatable in the modern war.
Containerizing an application is the packaging of the software with its own OS, libraries, and dependencies required to run the software code and create a single lightweight executable - which is called a container. It runs consistently on any infrastructure. We will be using Docker and docker-compose to package our application.
Prerequisites
This tutorial assumes a good grasp of React and Django. This also assumes familiarity with docker and containerization in general.
Make sure docker and docker-compose are installed on your system.
Download docker from here
Getting Started
Without further ado, Let's start by creating an empty folder. Give it whatever name you like I am going to call mine django-react-docker. This will be our workspace where our React and Django code will exist.
Setting up Django application
Create a virtual environment
First things first, create a virtual environment with virtualenv. (If not installed install with pip install virtualenv.) Create a new virtual environment with the following command in terminal.
virtualenv venv # Specify python version if multiple installed
this will create a new folder venv. Now activate the environment with following command:
Windows:
.\venv\Scripts\activate
Linux/Unix
source ./venv/bin/activate
Installing dependencies
Install the required dependencies to run the Django application with the following command
pip install django djangorestframework django-cors-headers psycopg2-binary
django, the package for the framework.djangorestframework, the framework for Django to build rest APIs.django-cors-headers, a Django app to add CORS headers to the application.psycopg2-binary, PostgreSQL Database adapter for python.
These are the minimal dependencies we will need for our application to function.
Create a requirements file
The requirements file will keep a list of dependencies used in our application. Use the following command in the backend folder to create a requirements.txt file.
pip freeze > requirements.txt
Create a Django project
Let us create a django project by using the following command:
django-admin startproject backend
Note: The
backendis the name of the Django project name it whatever you want.
You'll see a project named backend in the root of your workspace.
Start the project
Now, start the project by executing the following commands:
cd backend
python manage.py runserver
Make sure the virtual environment is active.
Visit
http://localhost:8000to see the default Django page.
Setting up the React Application
Creating the React application
First, make sure you are in the root directory. And run the following command:
npx create-react-app frontend
Make sure the Node.js is installed. We are using
16.13.0. Or you can download it from here.
Spin up the development server
To start the development server use the following commands:
cd frontend
npm start # or yarn start if you're using yarn
You must see the default react page on http://localhost:3000/.
Let's start Containerizing
Containerize the Django application
First, create a file .dockerignore. and then add the following content to the file.
venv
env
.env
Dockerfile
Next, Create a file named Dockerfile. This is the file that will contain our docker configurations for the backend. Add the following content to the file.
FROM python:3.8-alpine

ENV PYTHONUNBUFFERED 1
ENV PYTHONDONTWRITEBYTECODE 1

WORKDIR /app/backend

COPY requirements.txt /app/backend/

# Build psycopg2-binary from source -- add required required dependencies
RUN apk add --virtual .build-deps --no-cache postgresql-dev gcc python3-dev musl-dev && \
        pip install --no-cache-dir -r requirements.txt && \
        apk --purge del .build-deps

COPY . /app/backend/

CMD [ "python", "manage.py", "runserver", "0.0.0.0:8000" ]
In the above code,
- We start with a base image set variables
PYTHONUNBUFFEREDandPYTHONDONTWRITEBYTECODEto 1 for logging and not creation of.pycfiles respectively. - Set the working directory inside the container to
/app/backend/for the backend. - Copy the requirements file to the working directory and install the requirements.
- Install required dependencies for building the psycopg2-binary from source
- Copy the content of our backend to the docker container
- The starting command for our container
Note: The
venvand other mentioned files and folders in.dockerignorefile are not copied.
Containerize the React application
Create a .dockerignore file in the /frontend/ directory, and add the following code:
node_modules
npm-debug.log
Dockerfile
yarn-error.log
Also, create a file named Dockerfile and place the following content in it.
FROM node:16-alpine

WORKDIR /app/frontend/

COPY package*.json /app/frontend/
RUN npm install

COPY . /app/frontend/

CMD ["npm", "start"]
The above code will do the following:
- Starting with a base image, it will set the working directory to
/app/frontendwhere our code shall reside. - Copy
package.jsonandpackage-lock.jsonfiles to working directory. - Install all the dependencies.
- Copy our code content to the working directory.
- Set server starting command with
CMD
Packaging our applications with docker-compose
For this, create a docker-compose.yml file in the root folder, inside django-react-docker, which will be the configurations for our application.
Place the following code content in the docker-compose.yml file.
version: '3.9'


services:
  db:
    image: postgres:14-alpine
    ports:
      - '5432:5432'

    environment:
      - POSTGRES_PASSWORD=postgres
      - POSTGRES_USER=postgres
      - POSTGRES_DB=postgres

    volumes:
      - ./data/db:/var/lib/postgresql/data/

  frontend:
    build:
      context: ./frontend
      dockerfile: Dockerfile

    ports:
      - '3000:3000'

    volumes:
      - ./frontend:/app/frontend

    depends_on:
      - backend

  backend:
    build:
      context: ./backend
      dockerfile: Dockerfile

    environment:
      - POSTGRES_PASSWORD=postgres
      - POSTGRES_USER=postgres
      - POSTGRES_DB=postgres

    ports:
      - '8000:8000'

    volumes:
      - ./backend:/app/backend

    depends_on:
      - db
So, here's what the above code does,
- We start by mentioning the version of docker-compose.
- And create three services: Database (
db), Frontend React (frontend), Backend Django (backend) - For
dbwe point it to the official postgres image, set environment variables, set volumes, and expose ports5432:5432 - Also for
frontendandbackendwe provide the build context i.e. the dockerfile to use for building the image expose ports8000:8000for backend and3000:3000for frontend. - Set volumes to map
./frontendand./backendinside the container. - The
depends_onproperty will ensure that thedbis running before starting thebackendandbackendis running before starting thefrontend.
Building our containers
To build our application, use the following command from the project root:
docker-compose build
After the successful command execution, if you list out all the images with following command:
docker images

# Or
docker image ls
We must see the images named django-react-docker_frontend and django-react-docker_backend. This means our build was successful.
Running the containers
The running of our containers is as simple as running the following command:
docker-compose up
This command will spin up three containers: one for
backend, one forfrontendand one for our database and create a network (more on networks in docker) and attach containers to the netork.
After this, the servers are accessible at the ports 3000 for frontend, 8000 for backend and 5432 for db. Visit here and you must see the react default page.
and here for the default 'django is running' page.
Stop the containers
To stop the containers we can just press Ctrl+C or we can use the following command:
docker-compose down
Note: The
docker-compose downcommand will remove the default network created and stop and remove the containers as well.
Check if our application works
So, now we have our containers running, we're ready to develop in our containers.
To check if our configuration works, we will try to connect to the database, build a very simple API and display some data in the frontend.
Build the API first
Step 1: Change the database
First, open the folder django-react-docker in a code editor. Edit and change the settings.py file.
- Change the database driver and configurations, find the
DATABASESvariable in the file and replace it with following content.DATABASES = { 'default': { 'ENGINE': 'django.db.backends.postgresql_psycopg2', 'NAME': 'postgres', 'USER': 'postgres', 'PASSWORD': 'postgres', 'HOST': 'db', 'PORT': '5432', } }
Note the
NAME,USERandPASSWORDare the same values from the env we provided in the composedocker-compose.ymlfile and host is our servicedband port accordingly.
Step 2: Set up CORS
By default cross application data-sharing is prohibited by the CORS policy. We need to configure our backend to allow sharing the data.
For this we use our django-cors-headers package we installed before. Change the following sections in the settings.py file.
INSTALLED_APPS = [
    # .... Other code
    'corsheaders',  # Add this
]
MIDDLEWARE = [
    "corsheaders.middleware.CorsMiddleware",
    "django.middleware.common.CommonMiddleware",
    ... # Remaining code
]

CORS_ALLOW_ALL_ORIGINS=True # Add this line too
The above code allows all the sites to access the data from our server but in production we will more likely use the CORS_ALLOWED_ORIGINS variable to set up a list of allowed origins.
More on
django-cors-headershere.
Create an API
For the sake of this tutorial we will not be following best practices for the API building but create a rather simple API for testing our connection.
First, add rest_framework to our installed apps in settings.py.
INSTALLED_APPS = [
    # .... Other code
    'rest_framework',  # Add this
]
Create a file views.py with path as django-react-docker/backend/backend/views.py and write the following code:
# django-react-docker/backend/backend/views.py
from rest_framework.decorators import api_view
from rest_framework.response import Response

@api_view(['GET'])
def send_some_data(request):
    return Response({
        "data": "Hello from django backend"
    })
Also in the urls.py file.
# django-react-docker/backend/backend/urls.py
...
from . import views

urlpatterns = [
    # ... other code
    path('test/', views.send_some_data), # Add this
]
Now visit the http://localhost:8000/test/ to see the response {data: 'Hello from django backend'}
Consume the API from frontend
In our frontend directory, open folder src/App.js and replace the whole content with the following code snippet and save the file.
import logo from './logo.svg';
import './App.css';
import {useState, useEffect} from 'react';

function App() {
  const [data, setData] = useState(null);

  useEffect(() => {
    fetch('http://localhost:8000/test/')
      .then(res => res.json())
      .then(data => setData(data.data));
  })

  return (
    <div className="App">
      <header className="App-header">
        <img src={logo} className="App-logo" alt="logo" />
        <h1>An Awesome Blog </h1>
        <h3>On Django, React, Postgres, and Docker </h3>

        <p>{data}</p>
      </header>
    </div>
  );
}

export default App;
Now if you visit http://localhost:3000/ you must see the following page:
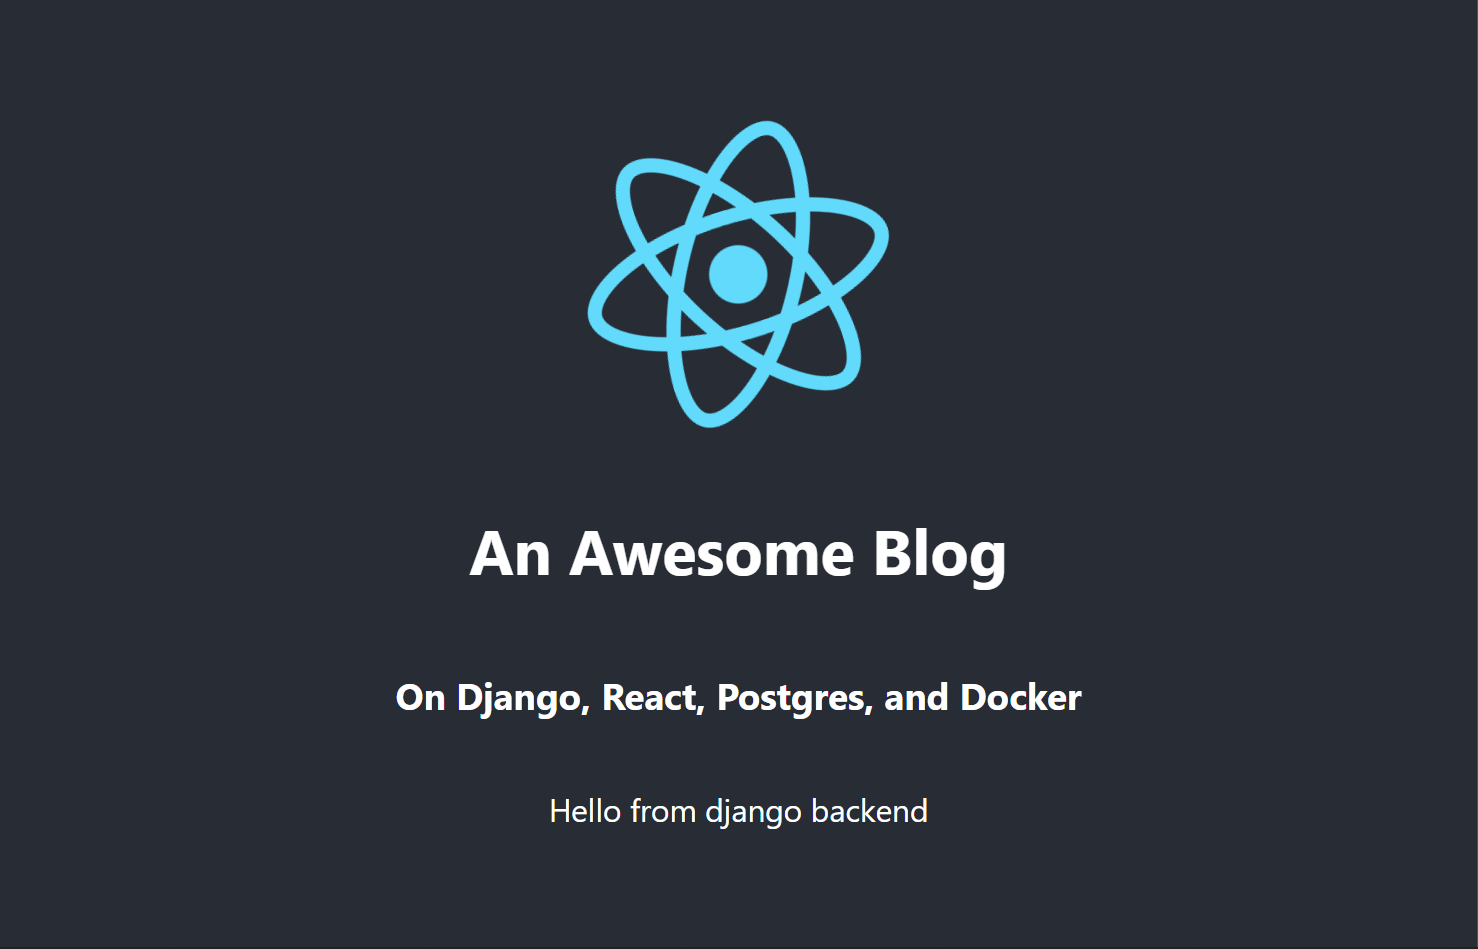
The above code snippet in the frontend sends a request to the backend with URL http://localhost:8000/test/ and sets it to a state data which is rendered in the UI later.
This means our frontend can successfully connect to the backend and fetch API data as well.
Conclusion
This is it!!!
Now we can start developing the application.
With this tutorial, we learned how to containerize and run an application with Django as backend, React as frontend, and PostgreSQL as our database.
View full code on GitHub.


